|
10 Gallon Brew System
5 Gallon All-Grain
Brewing
Beer
Log
Brewing Tips & FAQ
Brewzilla System &
Mods
Build a Keg Washer
Concentrated Brewing
Exhaust Fan/Vent
Hood
Extract w/ Grains Brewing
Fermentation Fridge/Freezer
Fermzilla Conical
Hard Cider
Recipe
Hard Seltzer
(MikeClaw)
Monster Mill
Parti-Gyle Brewing
Saving
& Reusing Yeast
Sour & Funky Beers
Wine
& Mead
Chest Freezer Kegerator
Fridge Kegerator
Sanyo Kegerator
Custom Tap
Handles
Keezer Compressor
Fix
Quick & Easy Drip Tray
Bread & Sourdough
Fermented Food
Gun Pictures
Hunting
Smoking Meat
|
|
Hard Seltzer (aka
MikeClaw) |
|
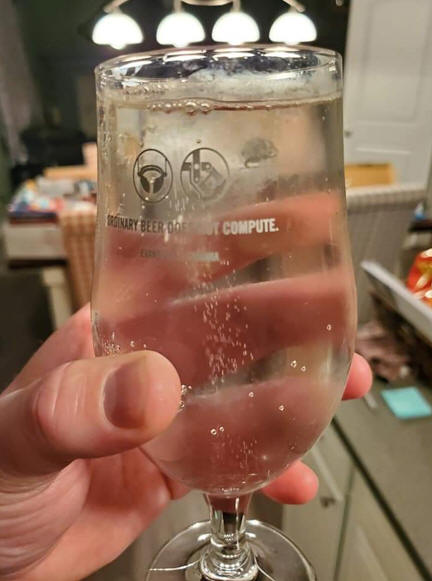
As much as I want to say I can drink super juicy NEIPAs &
barrel-aged stouts all day long, it's just not true. I used to have
a hard cider or something lighter after a couple more robust
beverages, but lately I've been trying more brands & flavors of hard
seltzer instead. What I really don't like is the $15 per
12-pack price tag, considering it's just sugar, yeast, and
flavoring. After doing a little research and trying a few
different batches, I think I have the process down. While my
seltzers may not have a perfectly clean fermentation profile, I can
knock out a 5-gallon batch for less than the cost of a 12-pack at
the store. I'll call that a win! I've listed out my process
for brewing MikeClaw below along with a few references and the
recipes I've brewed so far. It's a really quick & easy process and
turns out a crip & refreshing hard seltzer!
|
|
|
The brewing
process for hard seltzer is super quick and and easy.
I've listed my process below along with a few important
things to consider before brewing your first batch.
Water: There is quite a bit of discussion on
water for hard seltzer, mainly around the clarity of the
finished product. I use filtered tap water for my
seltzers, and I haven't had any issues with doing that.
If you choose to use RO or Distilled water, you may need to
add some brewing salts back in, depending on how much you
get into water chemistry.
Yeast Nutrient: Since you are only fermenting
sugar and water, the yeast will want/need a little help to
get going. I'm lazy, so I only add yeast nutrient &
energizer to the seltzer in the kettle. Others have had good luck with
staggered nutrient additions, which have really caught on in
the mead world over the last few years. That requires
buying different types of nutrients and adding them over the
course of a few days when fermentation is first starting
off. Both methods will result in a good seltzer, so do
some experimenting and see what works for you.
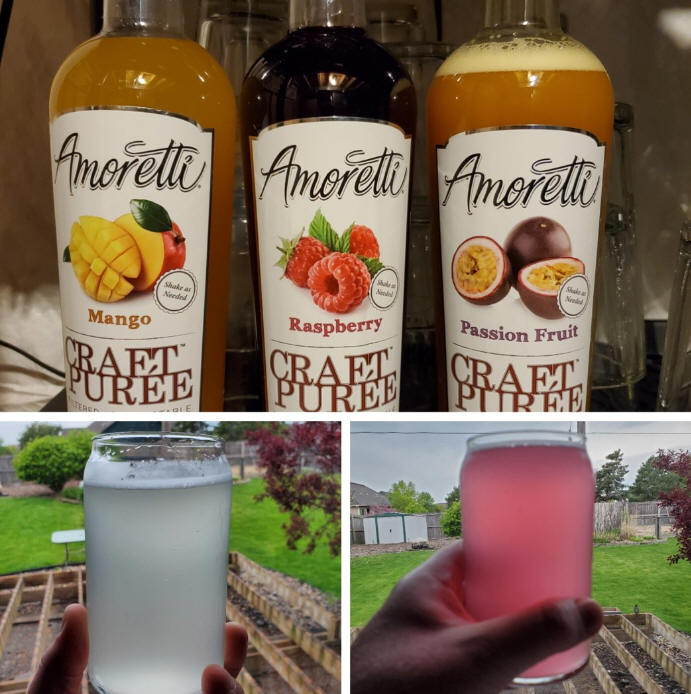
Flavoring: There are several different
flavoring options for hard seltzer. I've experimented
with the standard beer fruit flavorings (usually made by
Brewers Best (BB)) as well some
Amoretti Craft Puree, which adds a really fresh and
bright fruit flavor. Both have their benefits and
drawbacks. The BB flavorings are relatively
inexpensive, but some are better than others. I find
the Cherry to be very artificial tasting, and the Peach
tastes more like canned peaches rather than fresh. The
Amoretti has really great and fresh fruit flavor, but the
cost is around 4-5 times that of the BB option. I have
been experimenting with the BB flavors at kegging, and then
adding a splash of the Amoretti Craft Puree to each glass if
I think the batch needs more flavor. As I dial in what
BB extracts I like and in what volume and combination, I
will probably use less of the Amoretti, but it all depends
on what I'm looking for. I would suggest trying both
and seeing what your preference is, or go with a combination
as I have been doing.
Yeast: Yeast varieties for Seltzers have
changed as more and more brewers (home & professional) have
started experimenting with brewing seltzers. A lot of
people initially used wine yeast, but it appears the new
go-to yeast is the fast-fermenting Kveik yeast, specifically
the super neutral Lutra variant.
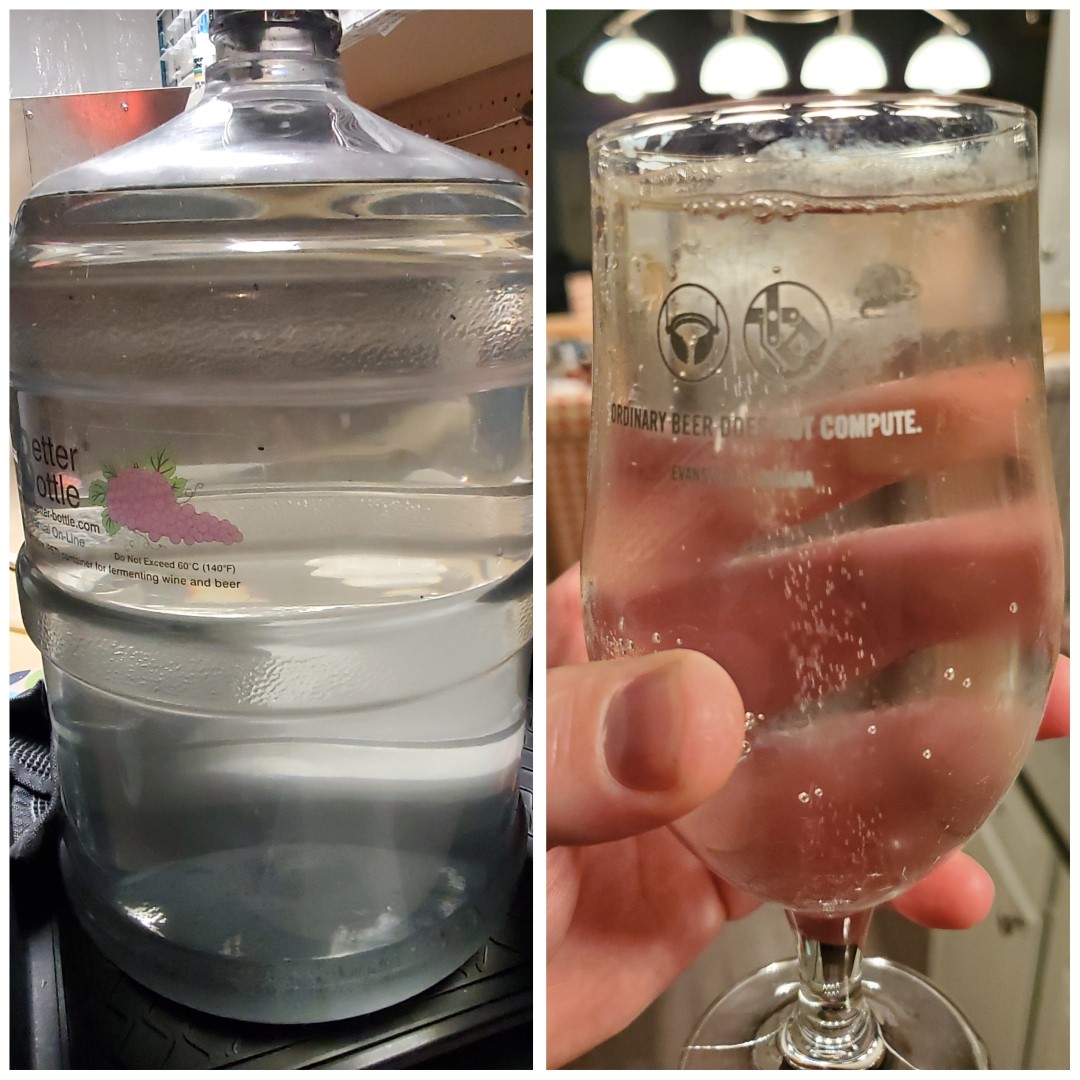
Clarity & Flavor Reduction - Activated Carbon &
Carbon Filtering
(NEW): Given time, the yeast will drop out of
suspension and you should be left with a crystal clear
seltzer. It took me a couple batches to figure out
that wine yeast flocculates (drops out) much slower than ale
yeast. I found it took at least 3 weeks to achieve clarity
without going through any other measures. That's why
some of my first batches were a bit cloudy, even though they
reached their final gravity. I also noticed a slight
fruity ester from the yeast that was always in the
background. After reading through an article in
Zymurgy magazine about brewing hard seltzer at home, I
noticed they recommended the use of activated carbon to help
strip additional yeast and fermentation character out of the
final seltzer. I've added a section to the site below
that goes through the process I followed in more detail in
case you want to try it on your seltzer at home. I was
VERY happy with the results!
|
|
|
|
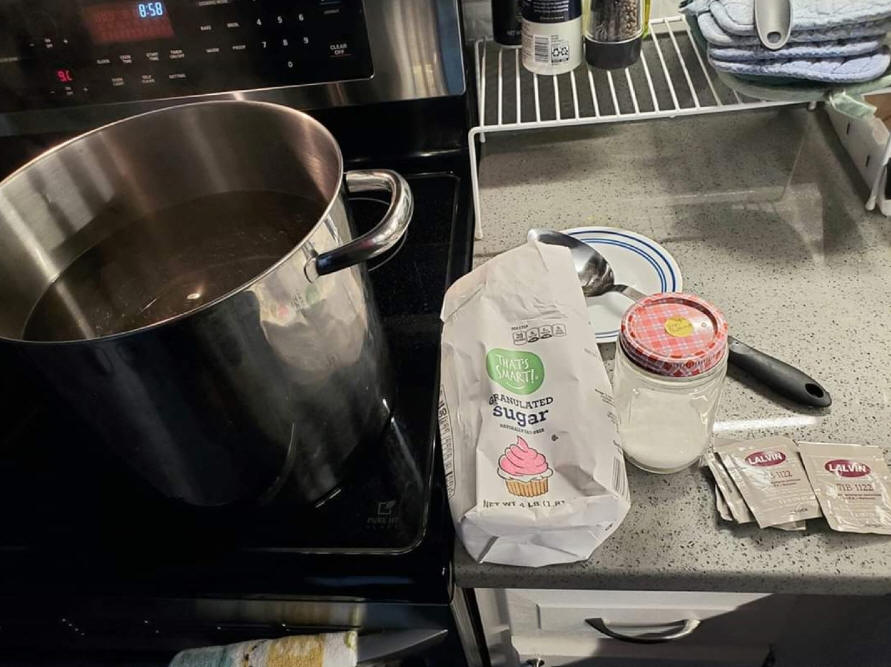
Ingredients:
-
4lb Table
Sugar
-
2 tsp Yeast
Nutrient
-
2 tsp Yeast
Energizer
-
1-2 packs
yeast (71-B, Kveik, or other neutral variety)
-
1-2 TB
Lemon Juice (optional)
Brewing
Process:
-
Bring 1-2
gallons of water to a boil along with the 4lbs of table
sugar. Make sure to stir the pot frequently until
the sugar is totally dissolved. Alternatively, you
could bring just the water to a boil and add the sugar
off heat, stir to mix, and add it back to the heat.
-
Boil for 5
minutes and turn off the heat.
-
Add Yeast
Energizer & Yeast Nutrient (and lemon juice if you're using) and
stir to combine.
-
Chill in a
water bath or other chilling method until the temp is
around 80-85 degrees.
-
Add the
chilled sugar water to your sanitized fermenter and top
up to 5 gallons with cold filtered tap water or RO/Distilled.
-
Sprinkle on
yeast, mix and aerate (I use a mix-n-stir), attach lid & airlock, and wait.
Fermentation seems to take a little longer with wine
yeast, so give it a couple weeks before taking a gravity
reading.
-
Aerate &
degas once or twice a day for the first 3 days or so.
This helps speed up the fermentation and reduce some of
the perceived yeast aromas I was noticing
post-fermentation.
Kegging:
This is where I
will add the Brewers Best (or other) flavoring to the keg and rack the
seltzer on top of the flavoring to mix. I've found
that 4-6 oz of BB extract is about right for me, depending
on the flavor(s) being used. This is where you can
experiment with blending different flavors, brands, and amounts to
see what works best for you. I would start with less
flavoring than you think, then rack the seltzer onto the
flavor, and try it again before you're done. For
carbonation, I just use the standard process, pressure, and
temp as with my beer. I find that the carbonation
isn't quite as high as commercial brands, but that's not
necessarily a bad thing, since those tend to make me burp a
ton. If you have a dual-pressure regulator, you can
try a higher pressure to see what you prefer.

|
|
|
|
|
|
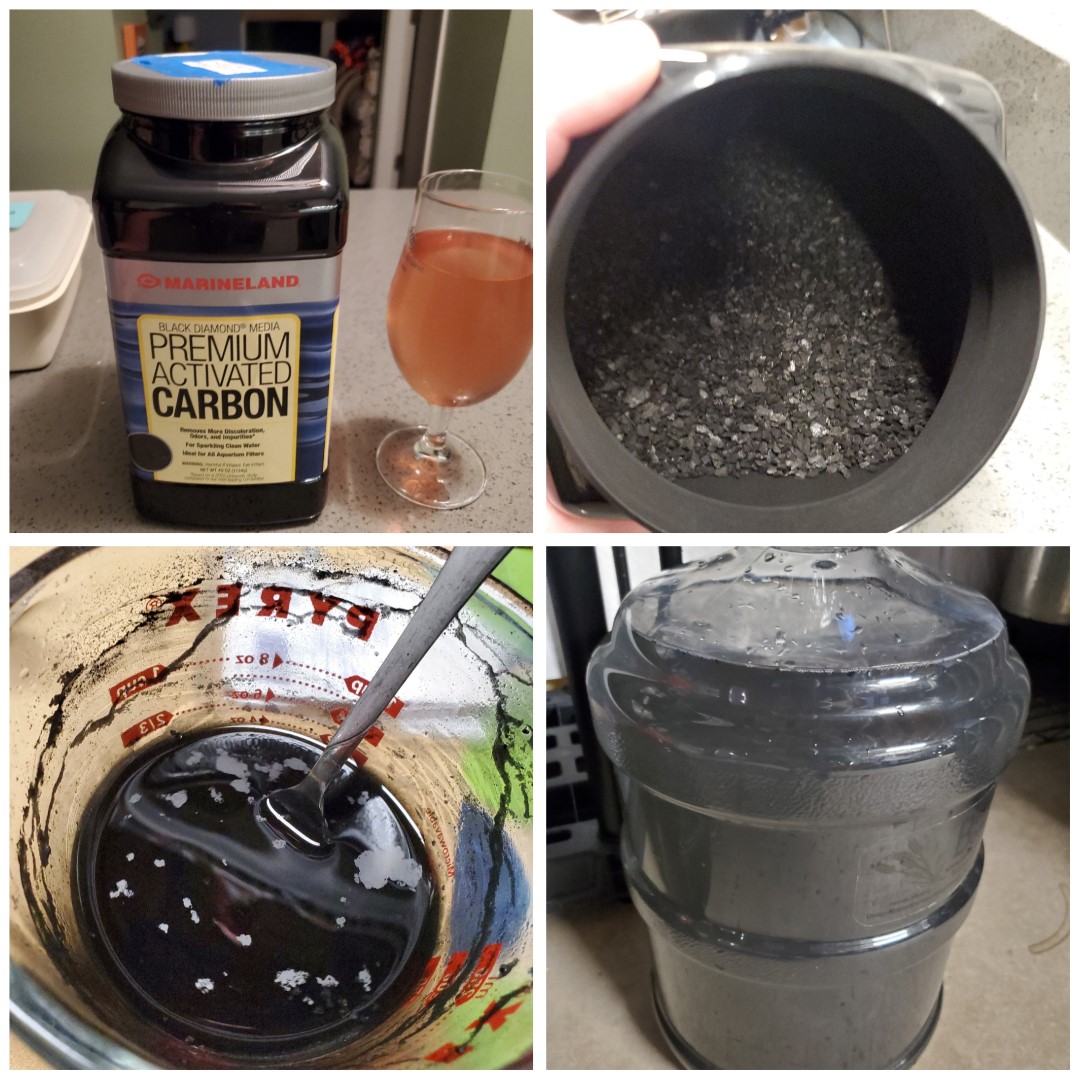 
Activated Carbon
- My first few batches of seltzer were a bit
cloudy, and they definitely had some residual
fruity and slight sulfur flavors & aromas.
The fruit flavoring additions did a good job of
masking these flavors, but I wanted to work on
trying to get rid of them before kegging.
My first attempt to improve clarity was to use
Activated Carbon in the secondary fermenter
based on some initial online searching.
This worked pretty well, but some of the
fermentation character was still coming through
in the final seltzer. Here's the process I
follow to add Active Carbon to my seltzers:
1. Clean &
sanitize a secondary fermenter
2. Add
1-2 TB of Active Carbon (AC) to the bottom of the fermenter
3. Rack
seltzer on top of AC to mix
4. Allow
the seltzer to sit for a week or two before proceeding to
carbon filtering (below) or kegging
|
|
|
|
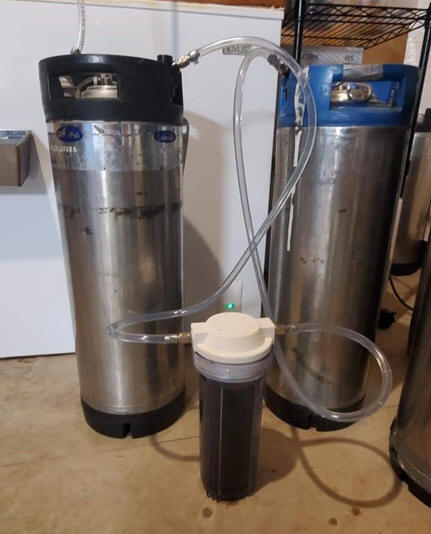
Carbon Filtering - With some residual
fermentation character still coming through
after trying to use Active Carbon in secondary, I
decided to try pushing my finished seltzer
through a whole-house carbon filter by jumping
from one keg to another, and that was a game
changer! After filtration, the seltzer was
almost as neutral as water, with all those
fermentation characters completely removed.
I likely don't need to use the activated carbon
in secondary, but it isn't doing any harm, so
I'm going to keep using that along with carbon
filtering to achieve a very neutral finished
product. Since this process requires
prepping and sanitizing more equipment, I usually like to
filter more than one batch of seltzer at one time if
possible. Here's the process I follow for carbon
filtering my seltzers before flavoring in the keg:
1.
Clean and sanitize a keg for the pre-filtered seltzer and
however many kegs you plan to keg as well
2.
Rack seltzer over to pre-filtration keg, attach lid, add CO2
& vent headspace
3.
Attach filter with quick disconnects to the pre-filtered keg
and the post-filtered keg, and make sure the direction of
flow on your filter is going the correct way
4.
Open the post-filtered keg pressure release valve to allow
the keg to be filled with the filtered seltzer
5.
Apply 5-10 PSI of CO2 to the pre-filtered keg and monitor
the flow through the carbon filter. You want around 1
gallon or less of seltzer to be passing through the filter
every minute.
6.
Repeat with second keg, or disconnect equipment and
thoroually clean the filter housing, filter, and tubing
|
|
|
|
Recipes:
Here are a few links to the Hard Seltzers I've made so far.
I'll keep adding more as I go along on my
Brew Log
page, so check that out for updated recipes, processes, and
ideas.
Future
Seltzer Ideas:
-
Double
Batch & Dilute: After talking with some pro
brewers and fellow homebrewers that are making Hard
Seltzer, they seem to be brewing higher gravity/double
batches of seltzer and then diluting them with water
post-fermentation. I like this idea for a couple
reasons. First being that you can brew two (or
more) batches of seltzer using only one fermenter, as
well as the time savings. The second would be
potentially reducing the amount of esters that I've
noticed after fermentation completes. If I brew a double
batch and then dilute with water, I would assume the
overall yeast character should be diluted as well and
result in a more clean tasting alcohol base for the
fruit. I'll be giving this a try on my next batch
to see how it comes out. As part of that
experiment, I will also be using tap water to dilute one
half, and distilled on the other to see if I notice any
differences.
-
Different Fruit Flavorings: A few of our
homebrew club members have tried what appear to be
vaping flavorings on both their beers and seltzers, and
have had good luck with the
Wizard Labs brand. One thing they all
mentioned is that these flavorings are VERY
CONCENTRATED, and only require a few drops for a whole
5-gallon batch. This kind of scares me a bit, but
I may need to order a few and try them out. The
prices seems very reasonable for how much flavor they're
supposed to add.
-
Vodka
"Seltzer" - Several companies have started releasing
vodka-based "seltzers" or ready-mix beverages.
This takes the brewing aspect out of things, but it
would still be interesting to play around with. If
you can get some cheap vodka from Sam's Club or Costco,
it may be worth a try, but it would definitely be more
expensive than just fermenting sugar. Brulosophy
did a great write-up on the process for making a vodka
seltzer
HERE.
|
|
|
|
Amoretti Craft Puree - Use to flavor the seltzer per glass
or the whole batch:
Amoretti
|
|
Contact Information:
MikeYoungHB
at gmail.com
*As an Amazon Associate I earn from qualified purchases*
|
|